第一次看到 AnimationSwitcher 微件时,我以为它可以把翻转微件。
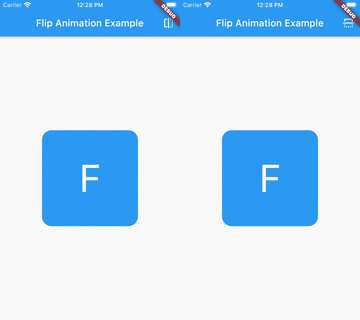
我们想要的效果
后来发现我理解错了:AnimationSwitcher 可通过用户选择的动画效果在多个微件之间切换,默认动画效果是是淡出。

它的优点是简单易上手,我会在下文展示如何切换动画。
另外,我发现了一个可以翻转动画的 flutter 包,叫作 animated_card_switcher ,但它似乎没人维护,而且代码也过于复杂。
以下是开发步骤:
- 创建正反面微件
- 使用 AnimationSwitcher 微件设置动画效果
- 编写旋转卡片的自定义转场生成器
- 添加曲线
创建正反面微件
因为前后微件不太重要,所以本示例中我会使用前后微件的简化版本。
大家只需要记住,一定要为顶级微件设置一个键,便于 AnimationSwitcher 检测到微件发生的更改,从而执行动画。

我会使用下列微件布局:
Widget __buildLayout({Key key, String faceName, Color backgroundColor}) {
  return Container(
    key: key,
    decoration: BoxDecoration(
      shape: BoxShape.rectangle,
      borderRadius: BorderRadius.circular(20.0),
      color: backgroundColor,
    ),
    child: Center(
      child: Text(faceName.substring(0, 1), style: TextStyle(fontSize: 80.0)),
    ),
  );
微件的正面视图和背面视图如下:
Widget _buildFront() {
  return __buildLayout(
    key: ValueKey(true),
    backgroundColor: Colors.blue,
    faceName: "F",
  );
}

Widget _buildRear() {
  return __buildLayout(
    key: ValueKey(false),
    backgroundColor: Colors.blue.shade700,
    faceName: "R",
  );
}
使用 AnimationSwitcher 微件设置动画效果
现在,我们用 AnimationSwitcher 微件为前后微件的转场设置动画效果。
我重写了 StatefulWidget 中的 build 方法,创建了一个页面,动画会显示在该页面的中心。
class MyHomePage extends StatefulWidget {
  MyHomePage({Key key, this.title}) : super(key: key);

  final String title;

  @override
  _MyHomePageState createState() => _MyHomePageState();
}

class _MyHomePageState extends State<MyHomePage> {
  bool _displayFront;
  bool _flipXAxis;

  @override
  void initState() {
    super.initState();
    _displayFront = true;
    _flipXAxis = true;
  }

  @override
  Widget build(BuildContext context) {
    return Scaffold(
      appBar: AppBar(
        title: Text(this.widget.title),
        centerTitle: true,
      ),
      body: Center(
        child: Container(
          constraints: BoxConstraints.tight(Size.square(200.0)),
          child: _buildFlipAnimation(),
      ),
    );
  }
}
我将动画从页面分离到 _buildFlipAnimation 方法,使代码更清晰。
以下是该方法的第一个版本:
Widget _buildFlipAnimation() {
  return GestureDetector(
    onTap: () => setState(() =>_showFrontSide = !_showFrontSide),
    child: AnimatedSwitcher(
      duration: Duration(milliseconds: 600),
      child: _showFrontSide ? _buildFront() : _buildRear(),
    ),
  );
}
单击微件可以看到正面微件正在消失,背面微件逐渐显现。再次单击,背面微件会消失,显现正面微件。

通过使用 AnimationTransfer 对转场进行定义,我们可以实现从 Y 轴旋转微件,只需输入 TransitionBuilder (转场生成器)即可。
编写自定义转场生成器来旋转卡片
我们想要的效果是旋转 180°,只需把我们的微件包装到 AnimatedBuidler 中,使用 Transform 微件应用旋转。
Widget __transitionBuilder(Widget widget, Animation<double> animation) {
  final rotateAnim = Tween(begin: pi, end: 0.0).animate(animation);
  return AnimatedBuilder(
    animation: rotateAnim,
    child: widget,
    builder: (context, widget) {
      return Transform(
        transform: Matrix4.rotationY(value),
        child: widget,
        alignment: Alignment.center,
      );
    },
  );
}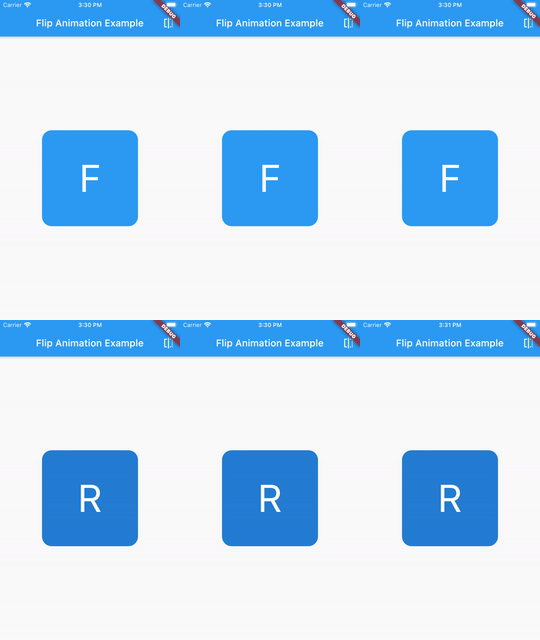
上图这个翻转没错,但缺了一些层次,不是我们真正想要的效果。而且,动画转场时背面微件一直在上层。

正面微件一闪而过
我们想要的效果是正面微件逐渐转换为背面微件。
于是我们需要修改了下列两项:
- 替换显示顺序:要显示的微件必须在堆栈的上层。
- 被替换的微件不再出现在动画的中间。
我们更改了 AnimationSwitcher 实例的 layoutBuilder 输入。
layoutBuilder: (widget, list) => Stack(children: [widget, ...list]),然后,动画旋转到 90° 时,微件的宽度为 0.0,只阻止前一个微件的旋转效果。
Widget __transitionBuilder(Widget widget, Animation<double> animation) {
  final rotateAnim = Tween(begin: pi, end: 0.0).animate(animation);
  return AnimatedBuilder(
    animation: rotateAnim,
    child: widget,
    builder: (context, widget) {
      final isUnder = (ValueKey(_showFrontSide) != widget.key);
      final value = isUnder ? min(rotateAnim.value, pi / 2) : rotateAnim.value;
      return Transform(
        transform: Matrix4.rotationY(value),
        child: widget,
        alignment: Alignment.center,
      );
    },
  );
}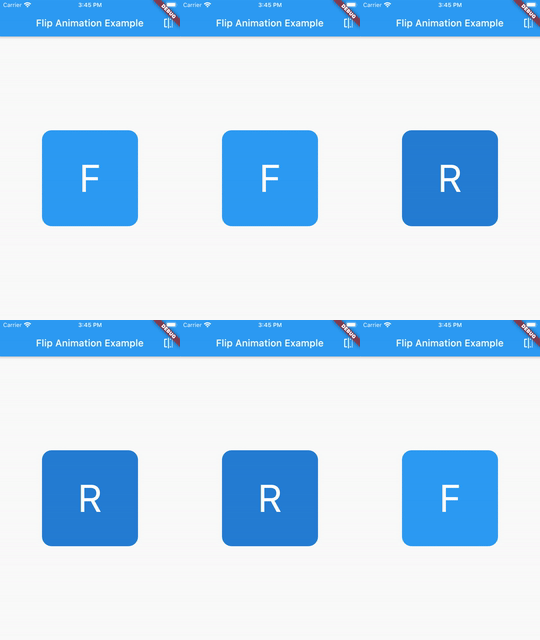
这个效果好多了,但还不够完美。要想加强微件的旋转效果,需要在微件上增加些“倾斜”效果。
此“倾斜”值在动画开始和结束时必须是 0.0。另外,因为我们要在部件的两端添加动画,所以两端的倾斜值必须是相反的。例如,如果正面部件的倾斜值是 0.2,那么背面部件的倾斜值必须是 -0.2。
Widget __transitionBuilder(Widget widget, Animation<double> animation) {
  final rotateAnim = Tween(begin: pi, end: 0.0).animate(animation);
  return AnimatedBuilder(
    animation: rotateAnim,
    child: widget,
    builder: (context, widget) {
      final isUnder = (ValueKey(_showFrontSide) != widget.key);
      var tilt = ((animation.value - 0.5).abs() - 0.5) * 0.003;
      tilt *= isUnder ? -1.0 : 1.0;
      final value = isUnder ? min(rotateAnim.value, pi / 2) : rotateAnim.value;
      return Transform(
        transform: Matrix4.rotationY(value)..setEntry(3, 0, tilt),
        child: widget,
        alignment: Alignment.center,
      );
    },
  );
}
为把倾斜应用到微件中,我们手动在 Matrix4 对象中设置了定义旋转的值。
点击下列链接获取 Matrix4 的更多信息:
https://medium.com/flutter-community/advanced-flutter-matrix4-and-perspective-transformations-a79404a0d828
添加曲线
最后,如果想给动画增加一些活力/强度,可以修改 AnimationSwitcher 的曲线输入参数。
有点曲线总是更好!
这是我的第一次尝试:
Widget _buildFlipAnimation() {
  return GestureDetector(
    onTap: _switchCard,
    child: AnimatedSwitcher(
      duration: Duration(milliseconds: 4600),
      transitionBuilder: __transitionBuilder,
      layoutBuilder: (widget, list) => Stack(children: [widget, ...list]),
      child: _showFrontSide ? _buildFront() : _buildRear(),
      switchInCurve: Curves.easeInBack,
      switchOutCurve: Curves.easeOutBack,
    ),
  );
}
大家看下图这个慢镜头,应该能看到这个动画的问题。
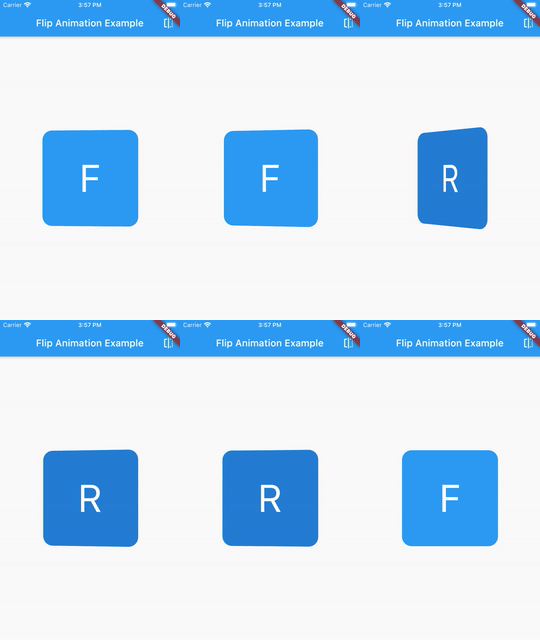
因为曲线并不相同,而且前面的微件动画被反向播放,导致能看到两个没正确叠加的微件,两个微件之间有轻微差异。

为避免再出现类似问题,我们必须使用曲线的翻转属性。
switchInCurve: Curves.easeInBack,
switchOutCurve: Curves.easeInBack.flipped,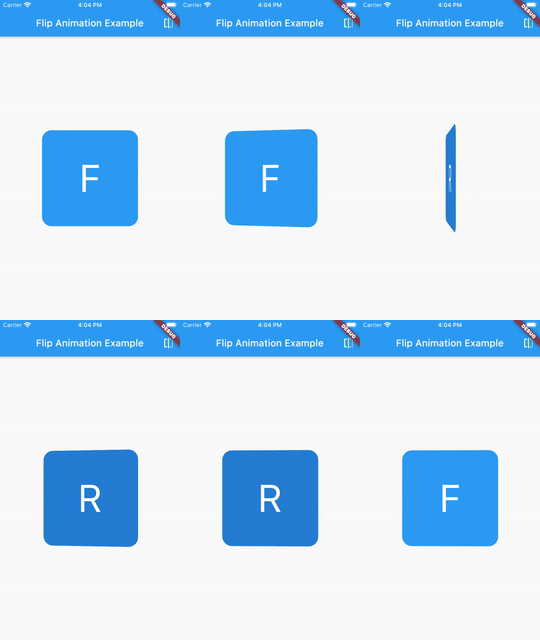
这次很完美!
总结
我只用了一个属性(微件的显示面)以及大约 30 行代码(仅动画)就完成了这个动画效果,所以用 Flutter 制作翻转动画并不难。
我不想为此创建一个软件包。在代码中添加依赖项意味着,如果它不适用于版本更新(例如),那么项目将被暂停一段时间。而且,假设不再保持依赖关系,就无法保证项目在未来 6 个月、1 或 2 年内被正确编译…
请合理复制粘贴此示例
欢迎大家使用我的代码!我不喜欢复制粘贴,所以我希望大家复制粘贴这些代码之后,能理解并根据需要对其进行个性化修改!
请点击 GONZALEZD / flutter_demos 查看本文的 demo。
原文作者:David Gonzalez
原文链接:https://medium.com/flutter-community/flutter-flip-card-animation-eb25c403f371


